Swagger Codegen for Swift3 and NodeJS
In this tutorial I’ll walk you through building a working Swift 3 App and a working NodeJS Service. Huge portions of the code on both the front and backend will be automatically generated. This tutorial will introduce you to how Swagger Codegen can save you tons of time on both the front and backend when building an integrated app.
If you’ve ever worked on an app with it’s own backend service before then you may have used swagger’s easy to use (and generate) Swagger UI documentation.
(Here’s a quick look at what Swagger UI Looks like with a defined API)
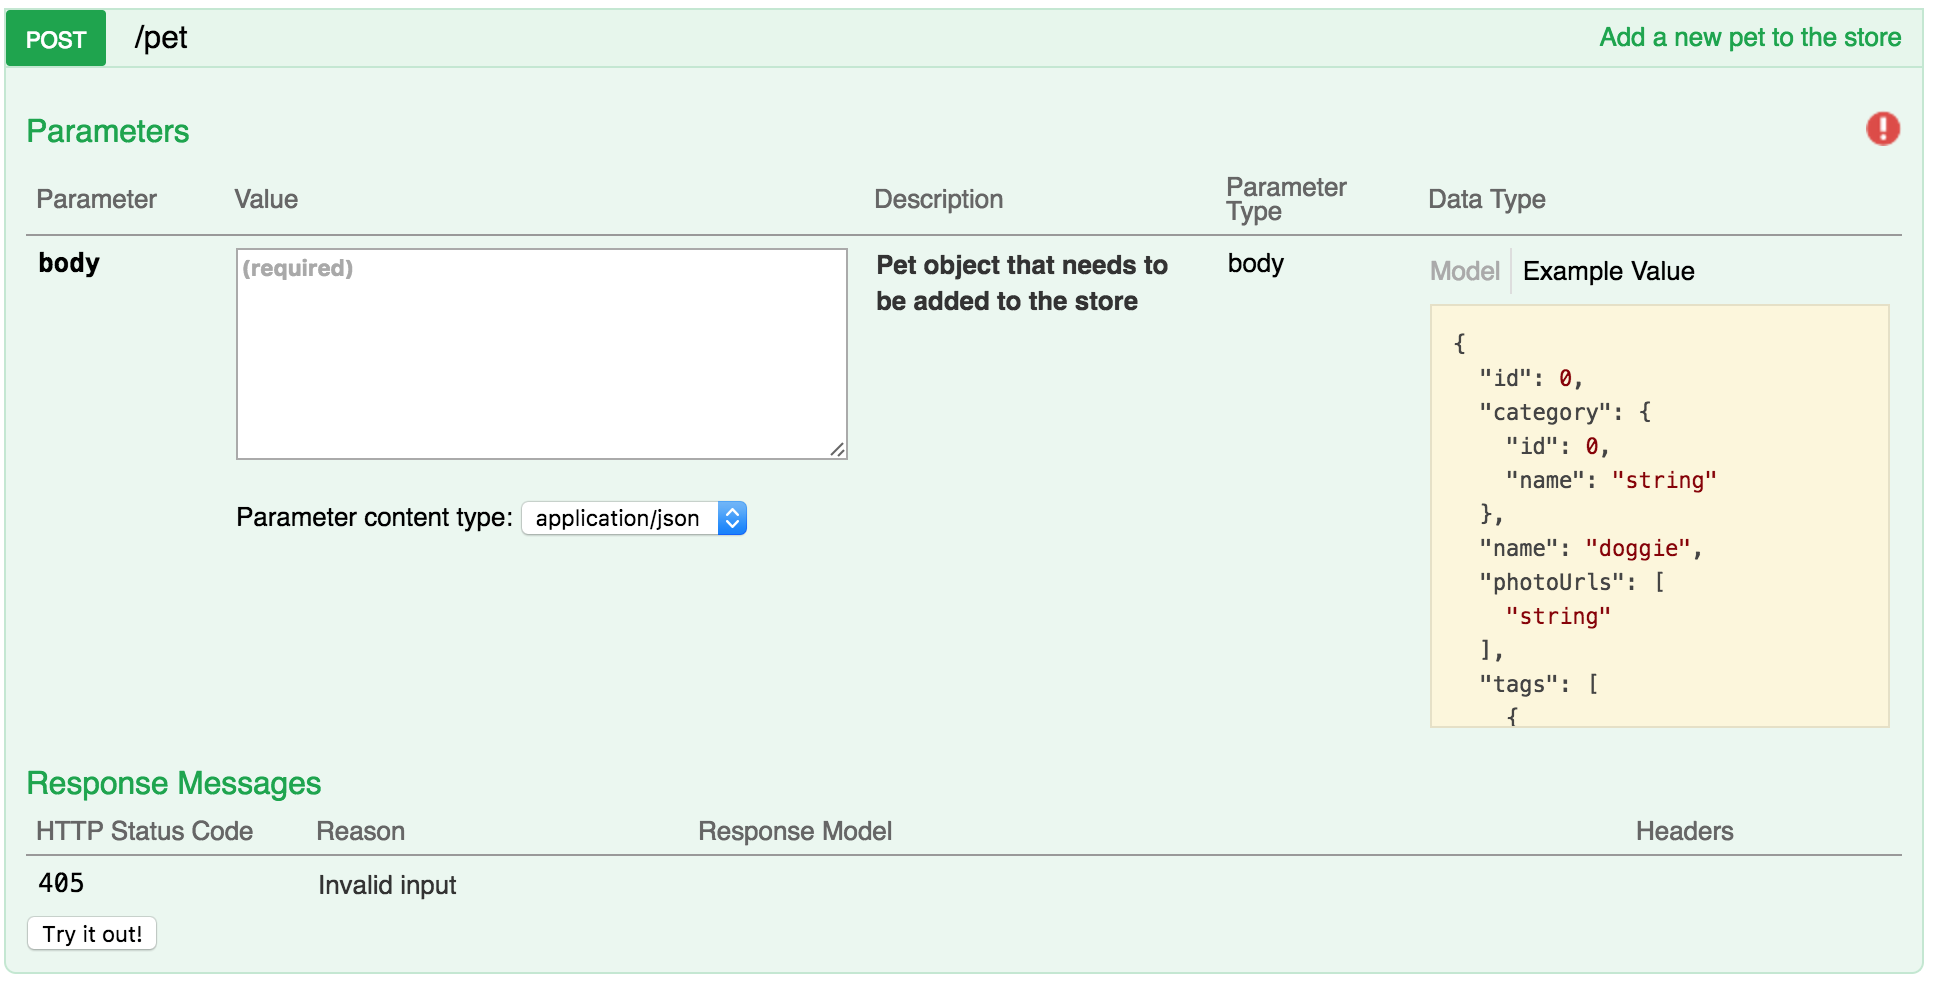
Swagger’s UI tool makes it easy to learn about the features of a backend service you’d like to interact with without needing to dig through interminable and abstruse documentation. Swagger’s documentation is easy to read and understand. It also allows you to test calls directly from your browser.
One of Swagger’s lesser known features is the capability to generate server AND client code (yes even Swift!).
All this is made possible with Swagger’s Open API Specification which defines a standard by which a REST API’s functionality can be defined. In other words once you create a swagger spec document (in either json or yml) that defines the expected behavior of an API you can just generate the code to interact with that endpoint because the expectations on both sides of the agreement have already been defined. You’ll see how this works in a minute when we start writing code.
To demonstrate how we can quickly write both the server-side and client-side code for an app we’re going to build an app for keeping track of Dwarfs we meet while playing Dwarf Fortress.

First we’ll need to create a swagger specification that will define the entire backend API for our app. Our API will handle simple Create and Read operations for keeping track of Dwarf migrants we meet in Dwarf Fortress.
To start off, we’ll just need to create a new swagger.yml specification file. So change directory to somewhere you’d like to create a new project. Once you’ve created a new folder / directory to store your project create a swagger.yml file.
$ touch swagger.yml
Then open that file in your favorite text editor and paste in the following code.
---
swagger: "2.0"
info:
  description: "Dwarf Tracker endpoints"
  version: "0.0.1"
  title: "Dwarf Tracker Service API"
host: "localhost:3000"
schemes:
- "http"
produces:
- "application/json"
The above block of code is laying down some baseline information about our API. It’s specifying the version of the Open API specification we’re using (currently the latest 2.0) as well as some other basic information about our API like a description and title. The host is very important information here, because it specifies the hostname and port we’ll be making network requests against (we’re using localhost for this demo, I’ll cover how to set that up later).
Next we’ll set up the different paths for our API. Paste the next block of code directly beneath the previous block to continue creating our Swagger API specification.
paths:
  /dwarf:
    post:
      summary: "Post a new Dwarf"
      description: "endpoint for posting a newly created dwarf to the server"
      operationId: "postDwarf"
      parameters:
        - name: payload
          in: body
          required: true
          description: A single JSON object containing the dwarf definition
          schema:
            $ref: '#/definitions/Dwarf'
      responses:
        200:
          description: indicates a successful update
    get:
      summary: "All dwarves"
      description: "Gets all dwarves"
      operationId: getDwarves
      responses:
        200:
          description: "An array of dwarf objects"
          schema:
            type: array
            items:
              $ref: '#/definitions/Dwarf'
Now our API has a single route: /dwarf
When we call this endpoint we would use the url: http://localhost:3000/dwarf
Next we have defined two HTTP Methods in our API for interacting with this single endpoint. If we’d like to POST a new dwarf we can see we’ve specified that a payload will be required in the body. Additionally we’ve defined a schema with this strange bit of syntax:
$ref: '#/definitions/Dwarf'
This is a reference to a definition of an object that holds data types that can be consumed and produced by operations. These data types can be primitives, arrays or models. We can define objects that we’re going to re-use in the specification so we don’t need to type them over and over again. This will be the final part of our specification.
Take the following code snippet and post it below your last in the same file to finish the swagger.yml file.
definitions:

  Dwarf:
    type: object
    description: a short sturdy creature fond of drink and industry!
    properties:
      name:
        type: string
      age:
        type: string
      id:
        type: string
Here’s the finished .yml file for reference: https://github.com/normand1/DwarfTracker/blob/master/swagger.yml
Prerequisites
Now that we have the swagger specification that defines our interaction between our server-side code and our client-side code we’re ready to start generating them both! But first we’ll need to download a few tools to help us out, so make sure you have these installed before you proceed any farther:
- Xcode 8.*
- NodeJS v 0.12.*
- Apache Maven 3.*
- MongoDB 4.*
- Swagger CodeGen
Installation
XCode: Mac AppStore
NodeJS: https://nodejs.org/en/
Maven: http://maven.apache.org/install.html
MongoDB: http://treehouse.github.io/installation-guides/mac/mongo-mac.html
Next you want to install Swagger Codegen. The easiest way to install Swagger Codegen on a mac is via Homebrew… HOWEVER, we cannot use this method for installation when creating generating code for Swift3. The .jar file that homebrew will install is built from the latest release branch of Swagger which at the time this tutorial was written does not support Swift3.
First we need to clone the git repository with the branch that supports Swift3 so clone this repo to a new directory (a different directory than your DwarfTracker project directory).
$ git clone https://github.com/hexelon/swagger-codegen.git
Once the repo has been cloned, checkout the swift-3 branch and build the .jar file.
$ git checkout swift-3
$ mvn clean install
Now we’ve built the .jar file we’ll need to generate Swift3 code. You’ll find the .jar file we need at this path: swagger-codegen/modules/swagger-codegen-cli/target/swagger-codegen-cli.jar
Copy the swagger-codegen-cli.jar file and paste it into your top level DwarfTracker project folder.
Client-side Code Generation
Since you may need to run the next script often (anytime the swagger spec changes) you’re going to want to put the following script in it’s own shell script file. The following command will generate your front end swift code when run, but right now we’re just going to save it for easy future execution.
$ echo "java -jar swagger-codegen-cli.jar generate -i swagger.yml -l swift -o SwaggerClient" > client_build.sh
Open the client_build.sh file in your favorite text editor and you should see this:
java -jar swagger-codegen-cli.jar generate -i swagger.yml -l swift -o SwaggerClient
As you can see the above command will reference the .yml API specification we build a minute ago and it will output an SDK based on whatever language we specify with the -l parameter (in this case swift). Finally -o specifies an output directory we haven’t yet created… so create an output directory.
$ mkdir SwaggerClient
Make sure you have permission to execute the script we just created by running:
$ chmod a+x client_build.sh
Then, execute the script:
$ ./client_build.sh
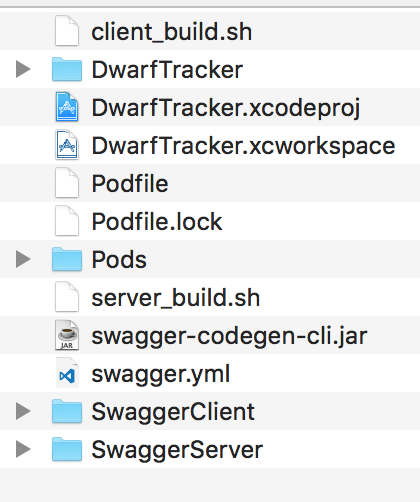
Assuming everything worked as expected you should see a number of new files in your SwaggerClient folder.
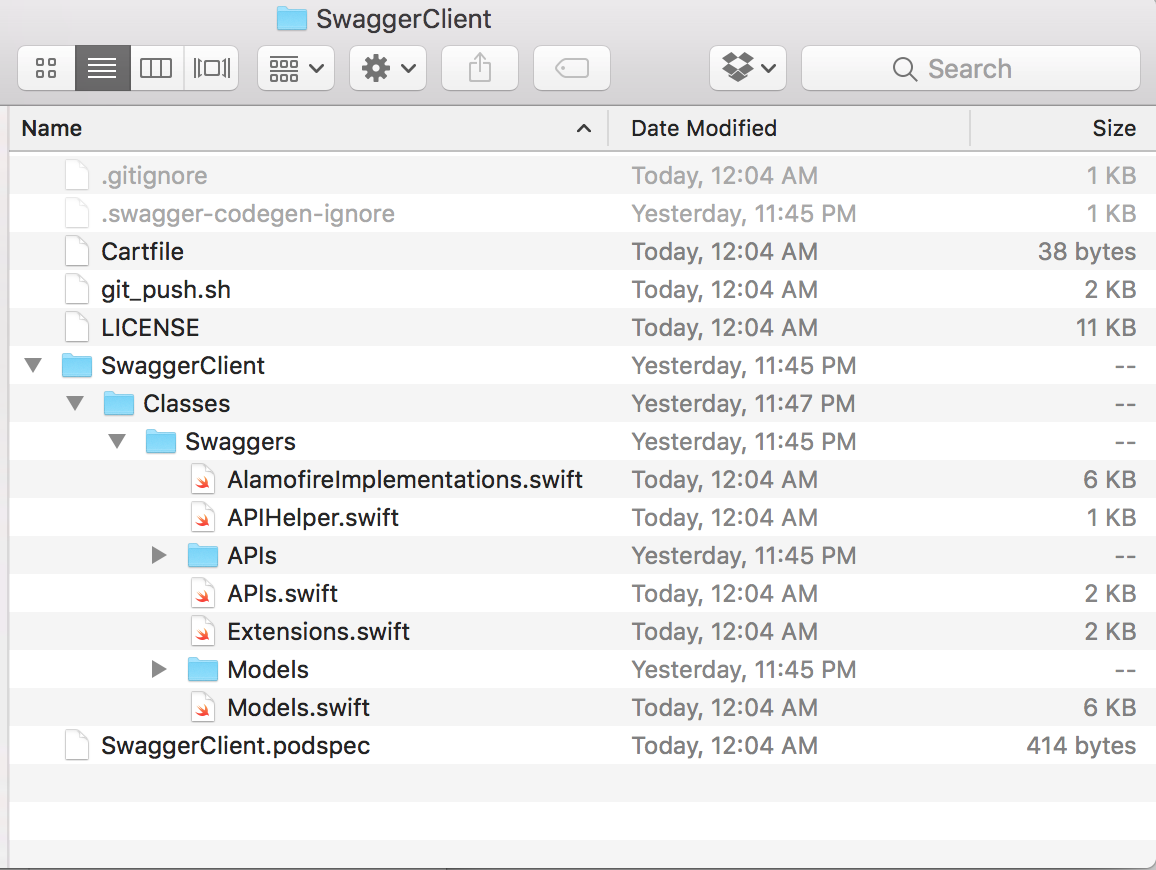
If you’re SwaggerClient Folder looks like the one above you’re in good shape.
Server-side Code Generation
Follow the same steps again, but for the server-side code this time. Create a new folder for the swagger server code named SwaggerServer and replace swift with nodejs-server in the build script as so.
$ echo "java -jar swagger-codegen-cli.jar generate -i swagger.yml -l nodejs-server -o SwaggerServer" > server_build.sh
Make sure the script has the executable permission, and run the script.
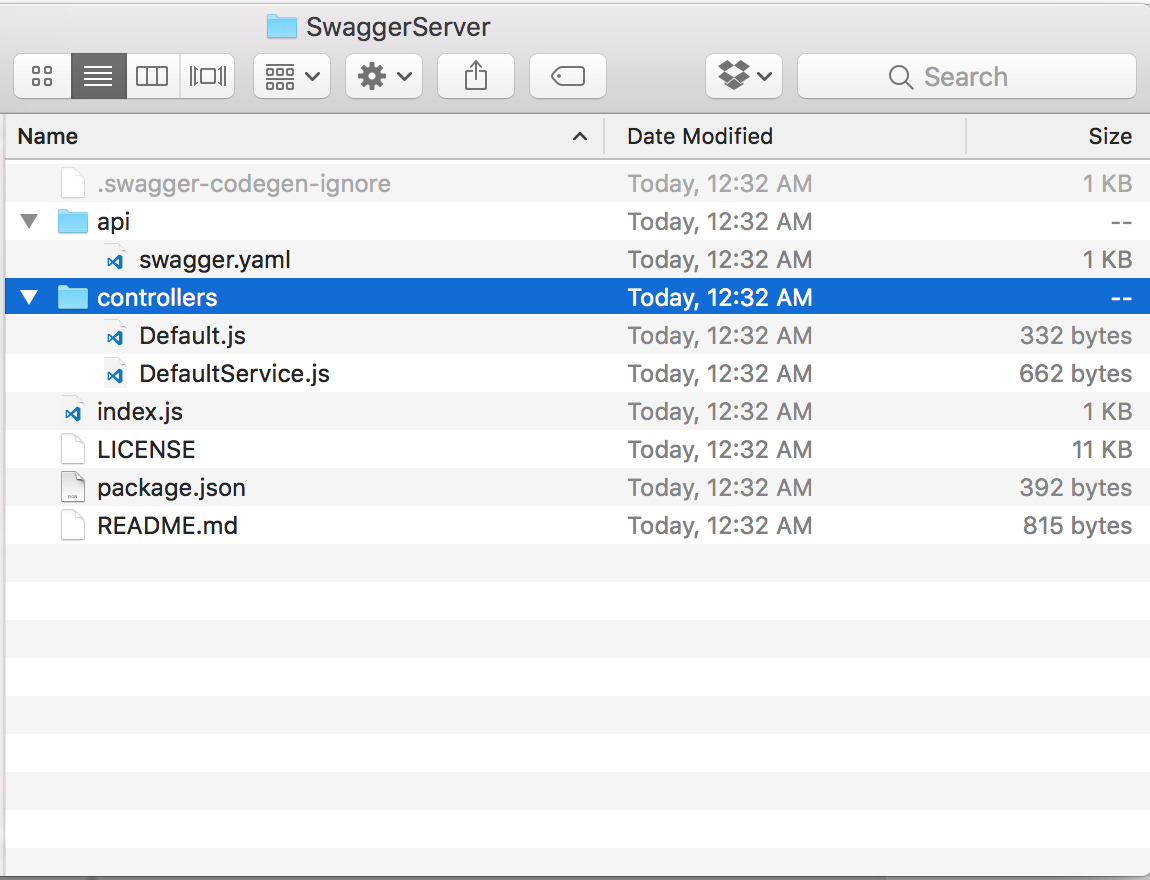
You should now have files in your SwaggerServer folder that resemble the files above.
Starting and Running the Server
First we need to install the any packages our Swagger Server needs to run, so change directory into your SwaggerServer folder.
$ npm install to install any needed dependancies.
Now we can start the server.
$ npm run start
If everything worked, you should see the following message:
Your server is listening on port 3000 (http://localhost:3000)
Swagger-ui is available on http://localhost:3000/docs
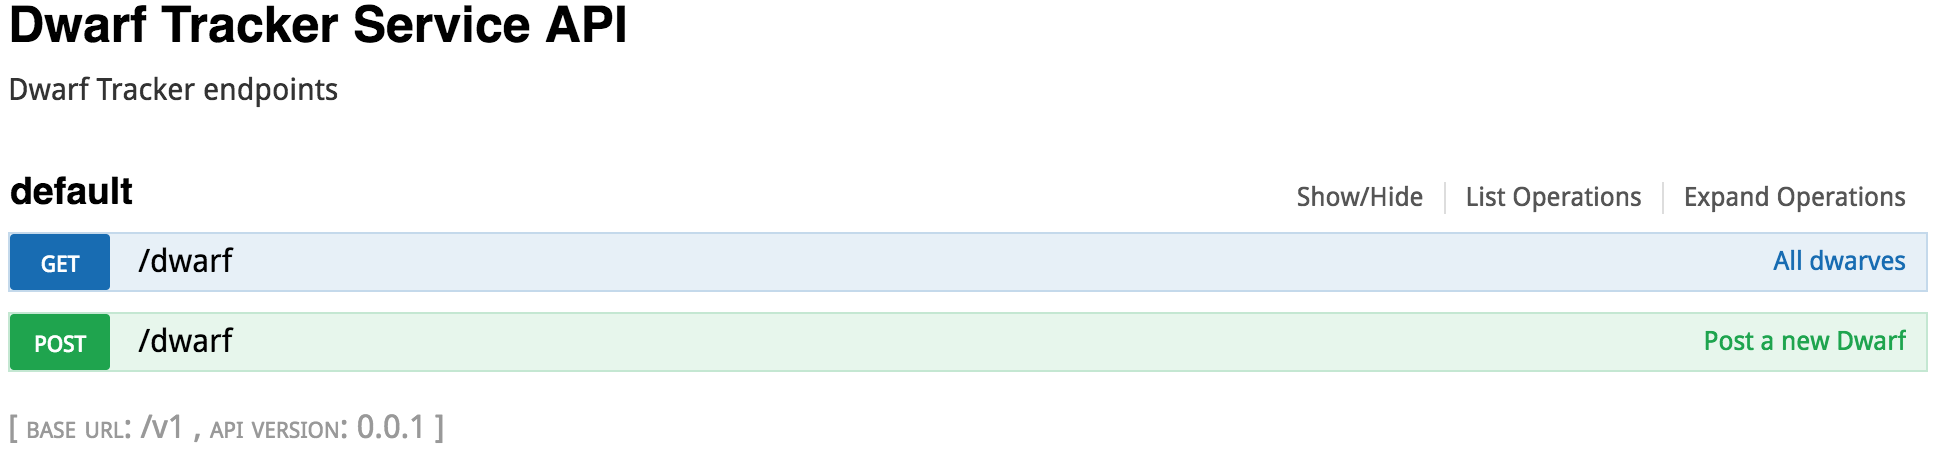
Open http://localhost:3000/docs in your browser to view the documentation for our API.
At this point you can send POST and GET requests to the API. You will get hardcoded responses, but that’s good enough for now!
Sending a GET request to http://localhost:3000/dwarf via SwaggerUI will result in this response:
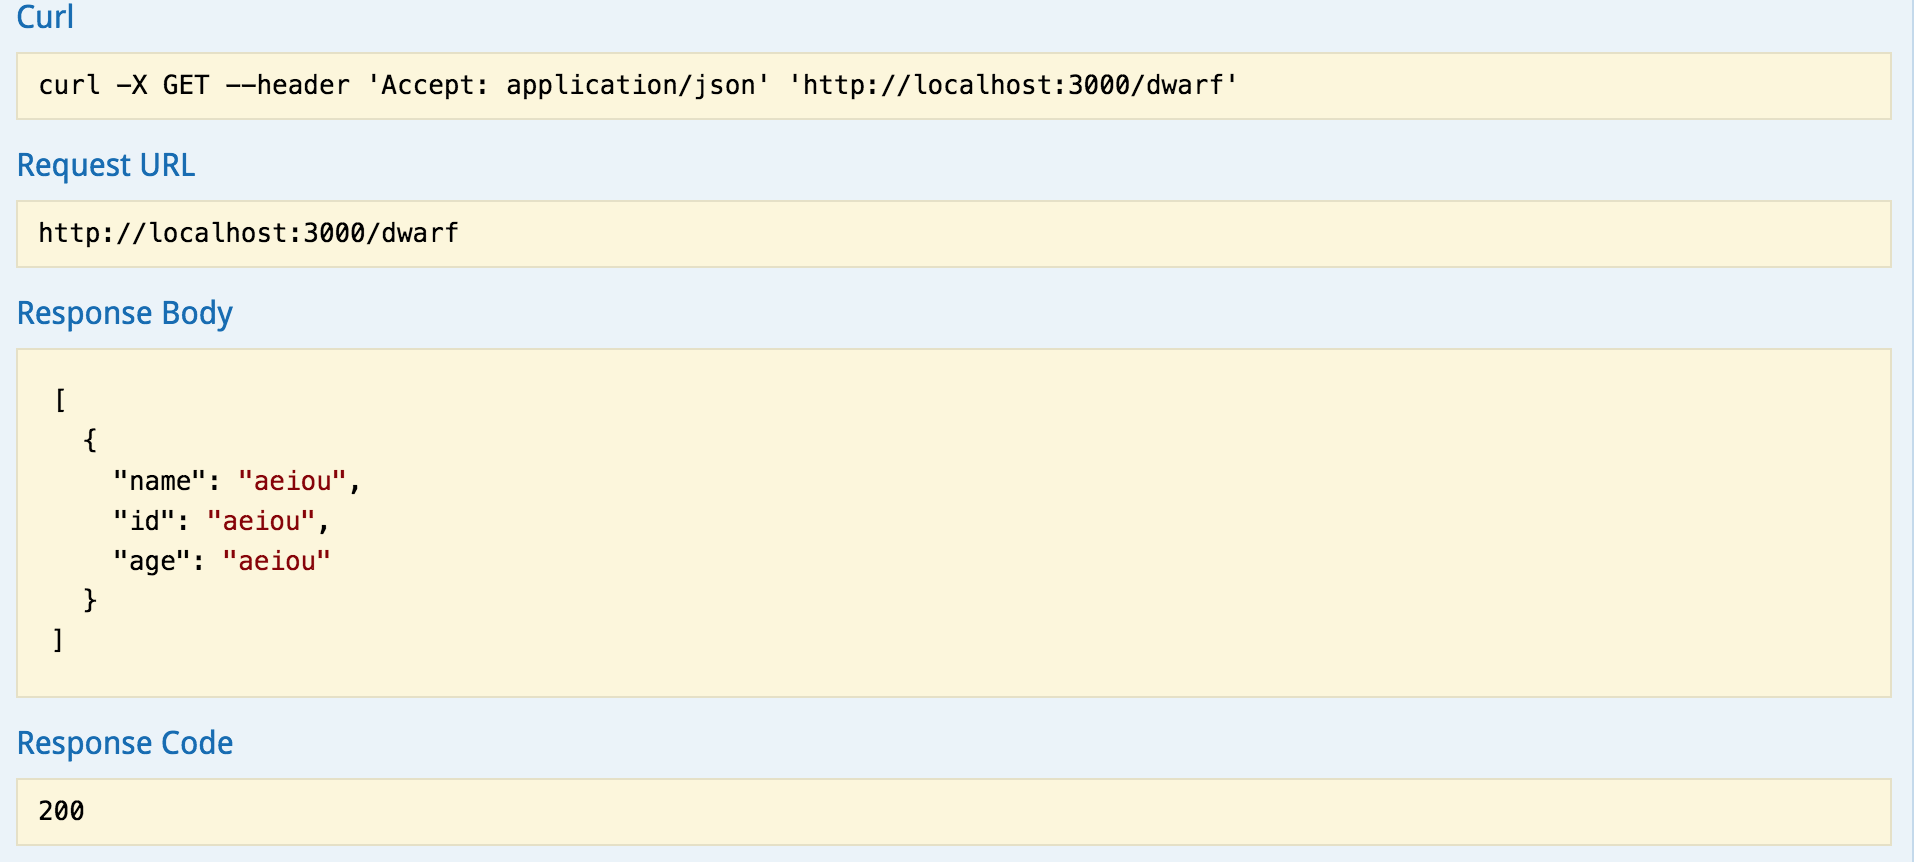
We are receiving a response with an array of Dwarf objects, just as we’d defined earlier in our swagger.yml file.
Structuring the iOS App
Now that the server is running and accepting requests, we’re ready to start building the rest of the iOS app. So far we’ve auto-generated the middleware and networking code that we’ll be using to communicate with the our backend service, but we still need to create a new Xcode project and pull the networking code we generated earlier into the final app.
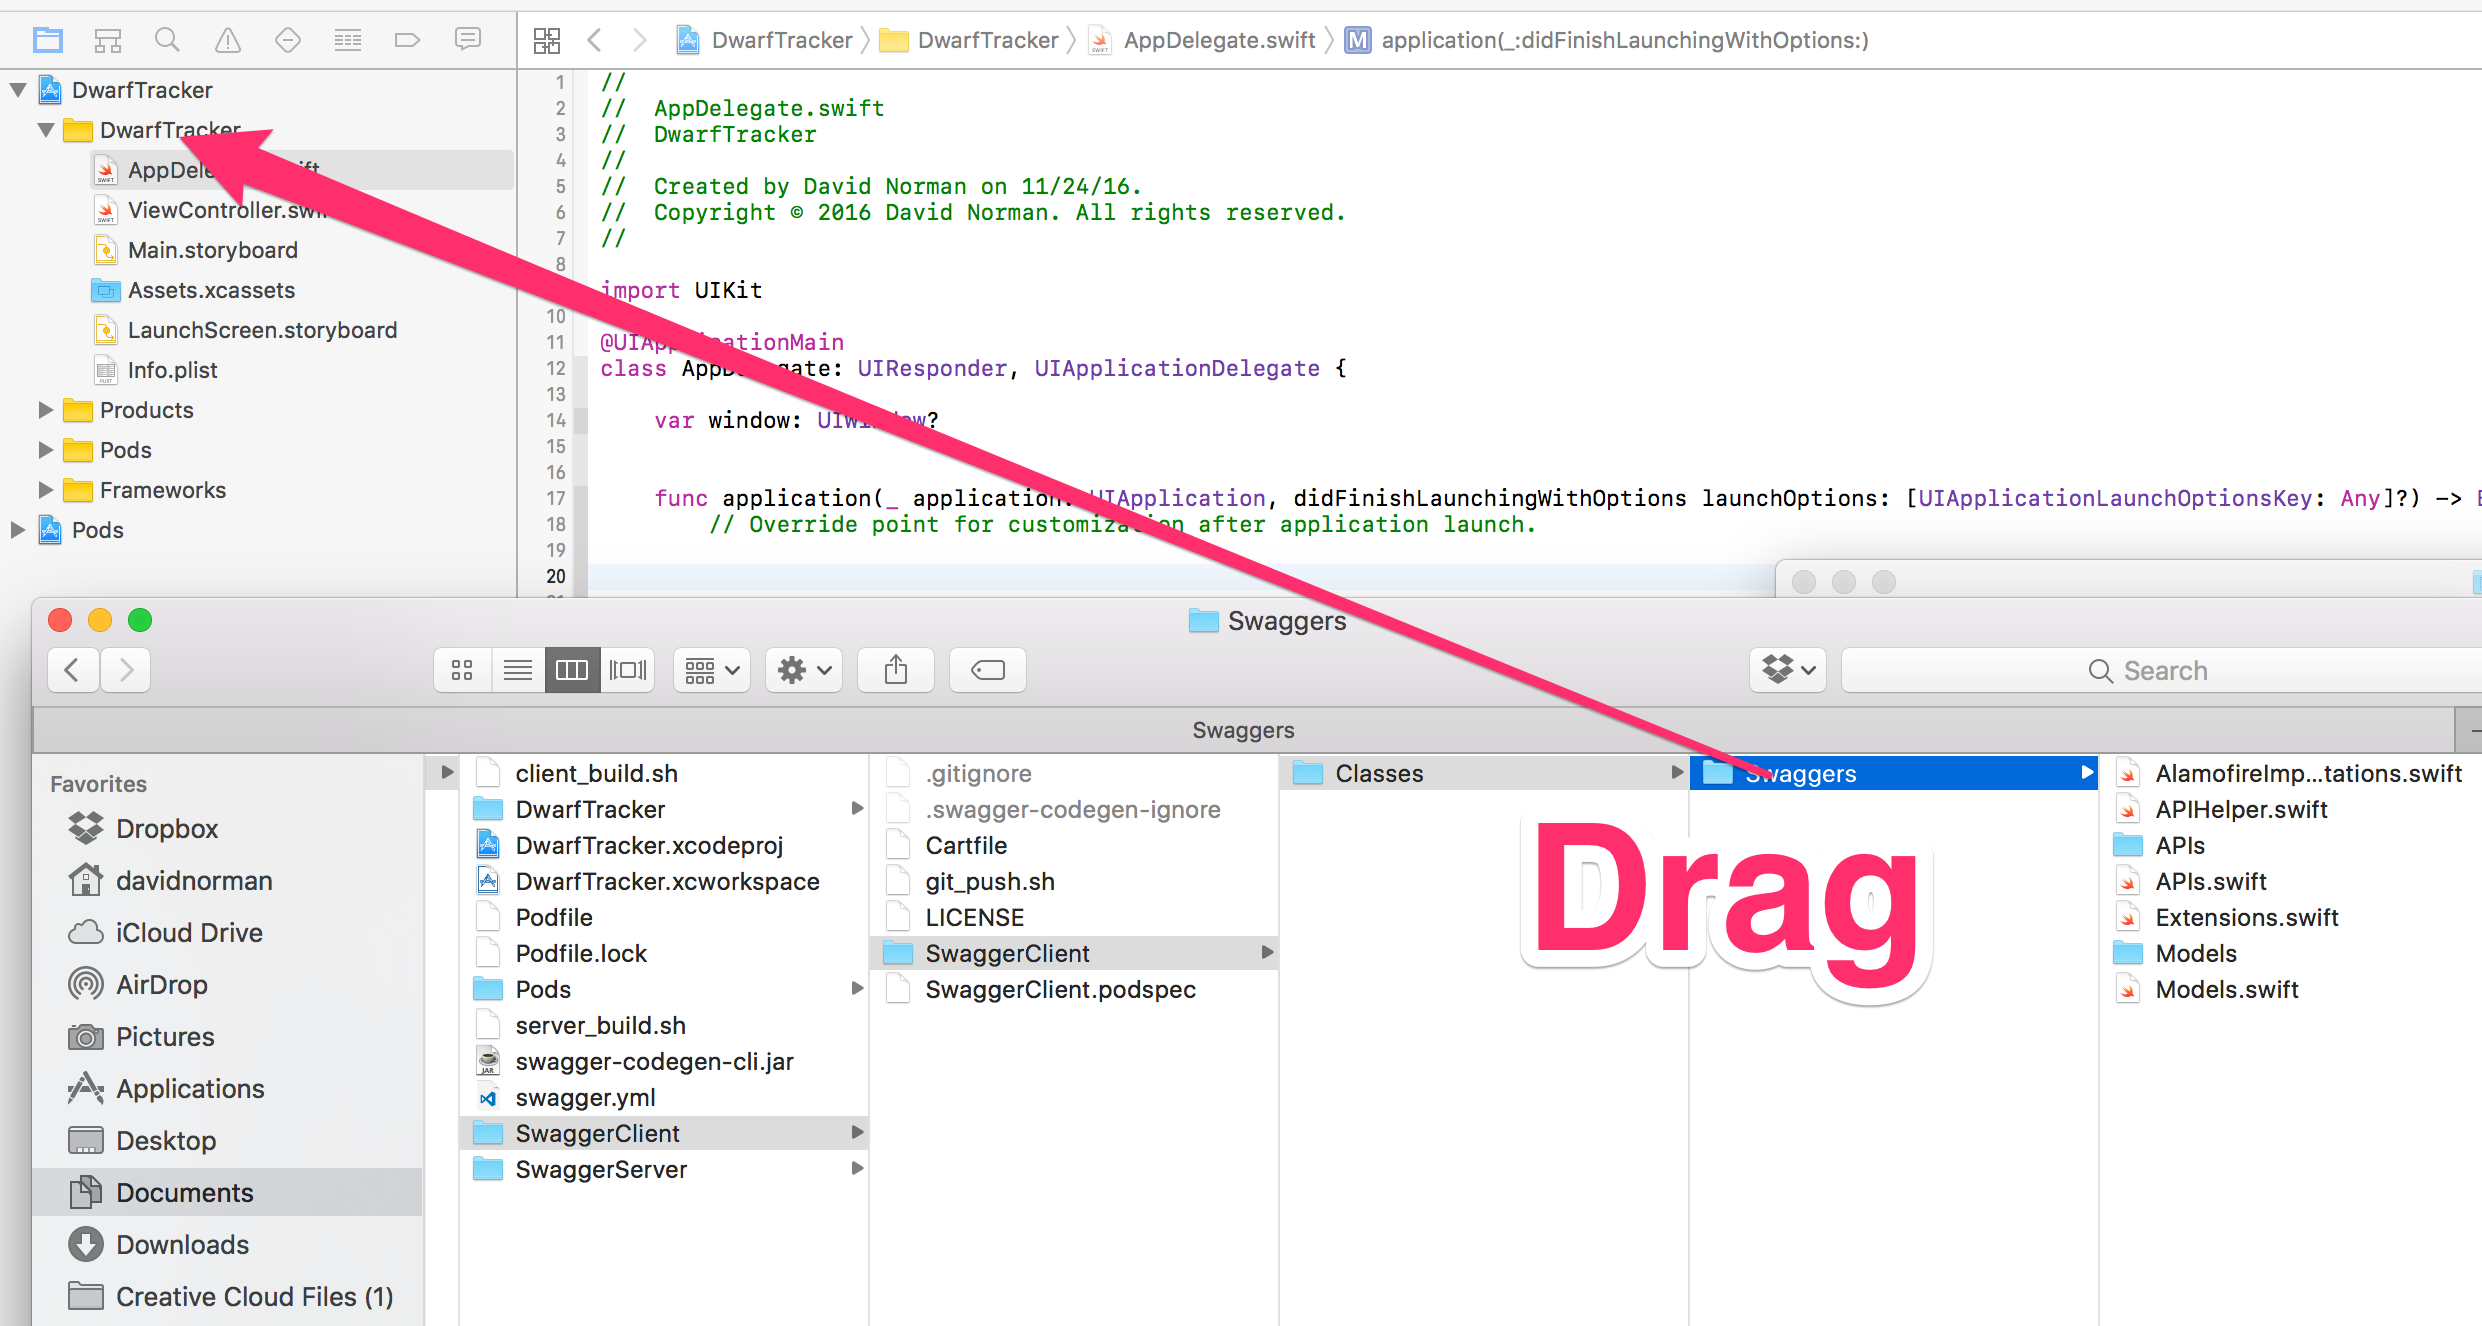
Open Xcode and create a new Xcode project. Create a “Single View Application” and make sure you save the project inside the same folder you’ve saved your SwaggerClient folder in. My folder structure looks like this after inserting my Xcode Project files.
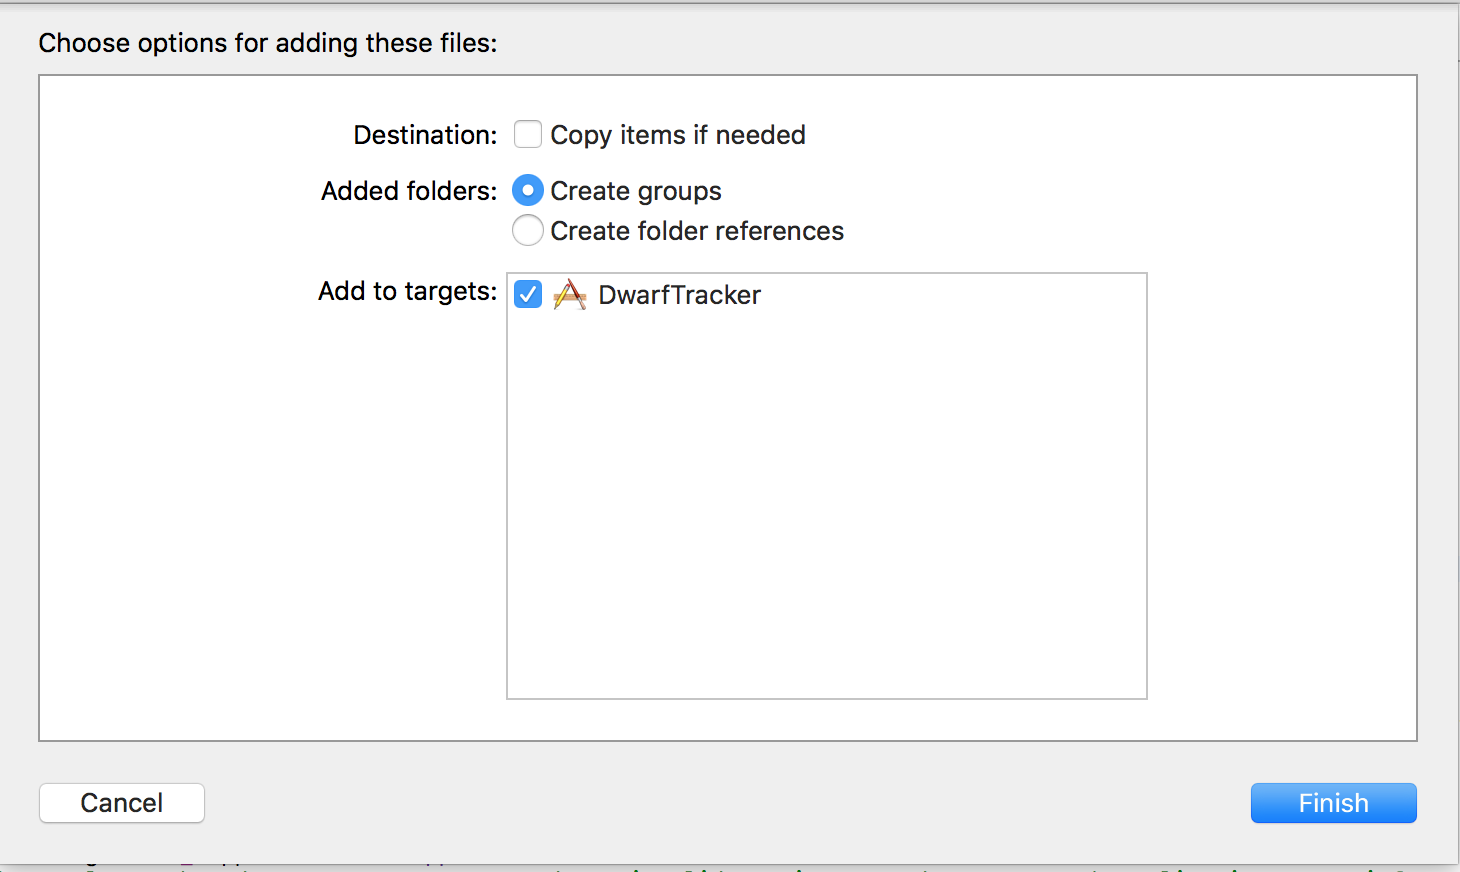
Once you’ve created the Xcode project it’s time to drag the Swagger Client code into the project and make sure you de-select “copy items if needed”so we don’t create a second copy of the directory. Also, make sure you have ‘Create groups’ selected.
Alamofire Instalation
The code we generated from Swagger uses the AlamoFire library to make the network requests we’ll need to communicate with the server, so we’ll need to install that next. For further installation instructions follow the examples on the AlamoFire Github page.
If you used cocoapods to install cocoapods ensure that you’ve opened the .xcworkspace instead of the .xcodeproj after cocoapod installation.
Now we’re ready to use some of the code we’ve generated. In Xcode open the AppDelegate.swift file and find the didFinishLaunchingWithOptions method at the top of the file.
We’re going to print out the first object in the array of Dwarves currently being returned by the backend service just to make sure everything is setup correctly.
    func application(_ application: UIApplication, didFinishLaunchingWithOptions launchOptions: [UIApplicationLaunchOptionsKey: Any]?) -> Bool {
        // Override point for customization after application launch.

       DefaultAPI.getDwarves { (dwarves, error) in
            if let dwarves = dwarves{
                print(dwarves.first!.encodeToJSON())
            }
        }

        return true
    }
Run the app and watch the log for results. You should see a similar print out to what you observed in swagger UI.
["id": "aeiou", "name": "aeiou", "age": "aeiou"]So there we are! Pretty cool. We didn’t have to parse any json, we got an actual Swift object back from the server and we didn’t even have to write a network call! So now in order to make Our DwarfTracker do something more than return data we’re going to need to do a bit more work.
Setting Up Server Controllers
So we haven’t actually posted any Dwarves to our service yet so how are we receiving that first Dwarf named “aeiou”?
Swagger code is great at generating code on the front end to do just about everything we need, but on the backend a bit more work is involved.
If you look at the DefaultService.js file you’ll see that our controller is currently returning a hardcoded example for our getDwarves route.
'use strict';

exports.getDwarves = function(args, res, next) {
  /**
   * parameters expected in the args:
  **/
    var examples = {};
  examples['application/json'] = [ {
  "name" : "aeiou",
  "id" : "aeiou",
  "age" : "aeiou"
} ];
  if(Object.keys(examples).length > 0) {
    res.setHeader('Content-Type', 'application/json');
    res.end(JSON.stringify(examples[Object.keys(examples)[0]] || {}, null, 2));
  }
  else {
    res.end();
  }

...
It’s time to update that code to actually return a Dwarf from our Database from our GET route and for our Post route to actually save a Dwarf to our DB.
Start the MongoDB Daemon by running:
$ mongod
We’re also going to install mongoose which will give a really simple and elegant way to interact with our Mongo database.
$ npm install mongoose --save
Now that Mongoose is installed, create a models folder and create a new file inside named DwarfModel.js.
Paste this code inside DwarfModel.js to define our DwarfModel to match the one we defined in our swagger spec. (Yes it would be nice to generate this via swagger and if you’ve done this let me know in the comments!)
var mongoose = require('mongoose');

var Schema = mongoose.Schema;

var dwarfschema = new Schema({
    name: String,
    age: String,
    id: String
});

var Dwarf = mongoose.model('dwarf', dwarfschema);

module.exports = Dwarf;
Now heading back to our DefaultController.js we can replace the entire file with the code below to make our backend dynamically create and read our dwarfs!
'use strict';

var mongoose = require("mongoose");
var Dwarf = require('../models/DwarfModel');

exports.getDwarves = function(args, res, next) {
  /**
   * parameters expected in the args:
  **/

  res.setHeader('Content-Type', 'application/json');
      Dwarf.find({}, function (err, docs) {
        if (err) throw err;
        res.end(JSON.stringify(docs));
    });
}

exports.postDwarf = function(args, res, next) {
  /**
   * parameters expected in the args:
  * payload (Dwarf)
  **/
  // no response value expected for this operation

  res.setHeader('Content-Type', 'application/json');
  Dwarf.create(args.payload.value, function(err, results) {
      if (err) throw err;
        res.end(JSON.stringify(results));
    })
}
Heading back to our top level index.js file we’ll now import mongoose and connect to our DB. Paste this code directlybelow the last import statement at the top of the file (which should be var serverPort = 3000;)
var mongoose = require('mongoose');

mongoose.connect('mongodb://localhost:27017/DwarfGenerator');
Now we can restart the server by running
$ npm run start
Now when we open the documentation at http://localhost:3000/docs we should be able to GET and POST to the /dwarf endpoint as expected.
In the POST /dwarf documentation go ahead and post a new Dwarf to your server. In the payload box paste:
{
  "name": "Gimli",
  "age": "100",
  "id": "1"
}
Hit the “Try it out!” button and your new Dwarf should be posted to the server!
That’s it! Now we have a working backend that can both save dwarves we post to it and return a list of all of our dwarves!
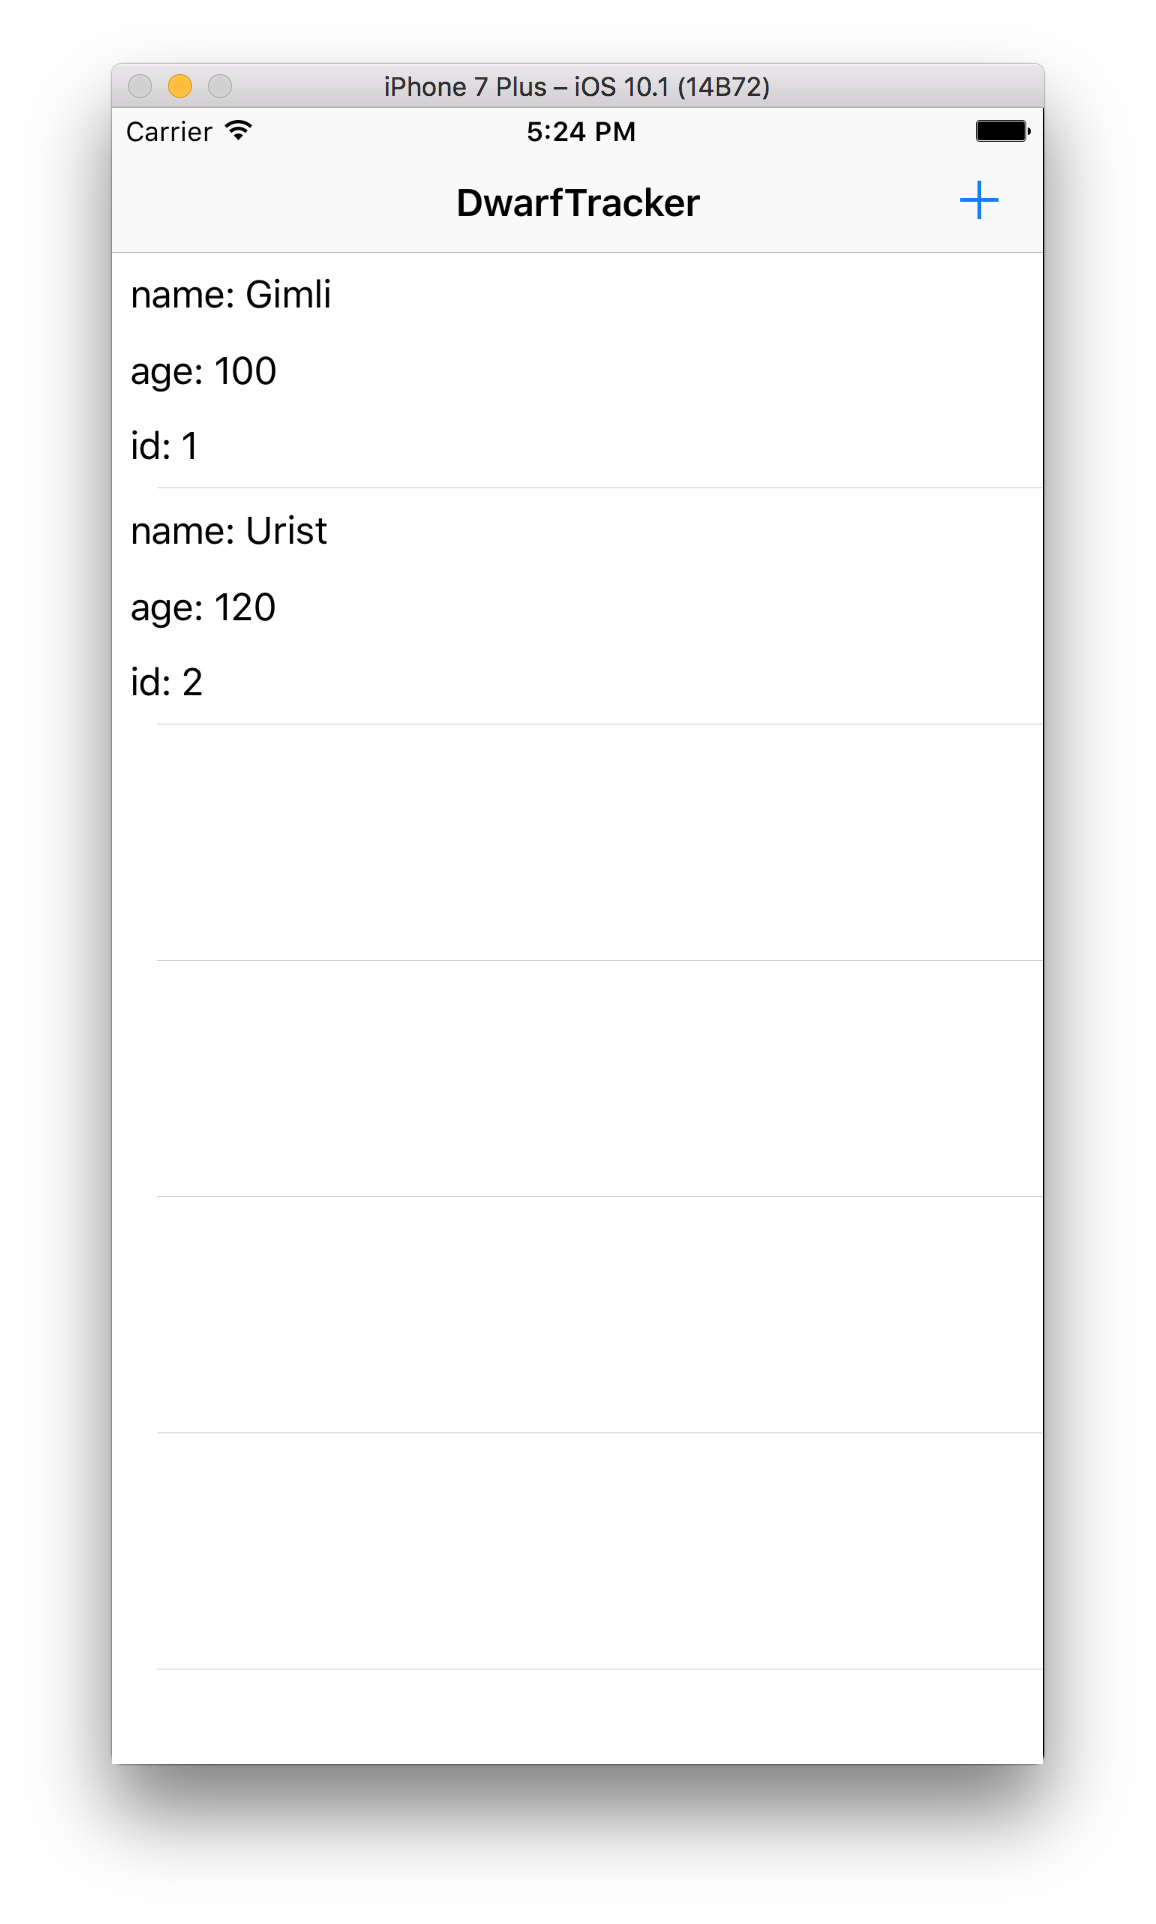
Finishing Up
Now it’s pretty simple to finish up the app from here. There are plenty of tutorials that show you how to display things in a UITableView so I won’t go into detail here. But, you can download a finished project with the full source code here: https://github.com/normand1/DwarfTracker Also, here is an example of the (extremely simple!) finished app
Thanks for finishing the whole tutorial! As a reward please enjoy this description of beautiful dwarf poetry:
